You are Here: BLOG / NEW CONCRETE DRIVEWAY INSTALLATION: A SUCCESSFUL PROJECT BY TORONTO CONCRETE REPAIR INC.
New Concrete Driveway Installation: A Successful Project by Toronto Concrete Repair Inc.
By TorontoConcreteRepairs on September 09, 2024
Toronto Concrete Repair Inc. recently completed an impressive concrete driveway installation in Toronto for a residential client. The homeowner approached the company with a common problem—there was no existing driveway on their property.
This absence not only impacted the home’s aesthetic appeal but also posed practical challenges, such as limited parking space and difficulty accessing the property. The homeowner sought a solution that would not only provide a functional driveway but also enhance the overall value of their property.
Project Description
After a thorough consultation, Hubert recommended a full installation to create a durable, long-lasting driveway that would not only enhance the property’s curb appeal but also provide functional space for parking.
The entire process, from excavation to final finish, was completed in just 1.5 weeks without any issues, showcasing the expertise and professionalism of the Toronto Concrete Repair Inc. team. Below is a detailed breakdown of the steps involved in this project and why each phase is crucial to achieving a high-quality, long-lasting driveway.
Project Details
- Length: 1.5 Week
- Location: Toronto, Ontario
- Work Completed: New Concrete Installation with Lime Stone Finish
RECENT POSTS
- Toronto Porch Repair Before and After
- Porch Makeover Ideas for Toronto Homes: Concrete Solutions for Curb Appeal
- What Is The Difference Between Concrete Resurfacing And Concrete Overlay?
- New Concrete Driveway Installation: A Successful Project by Toronto Concrete Repair Inc.
- How to Remove Water Stains & Discolouration from Newly Poured Concrete
- Concrete Resurfacing Pros and Cons
- Concrete Resurfacer vs Self-Leveling: Which Is Right for Your Project?
- Concrete Resurfacing vs Replacement: Which Option is Best for You?
Book a FREE Consultation Call
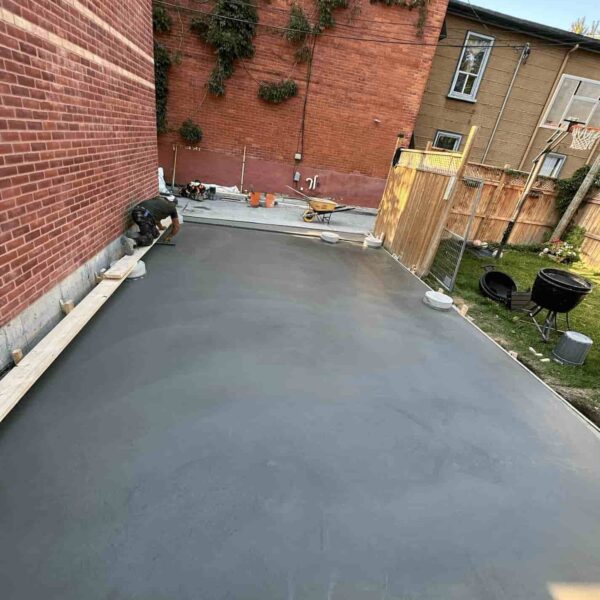
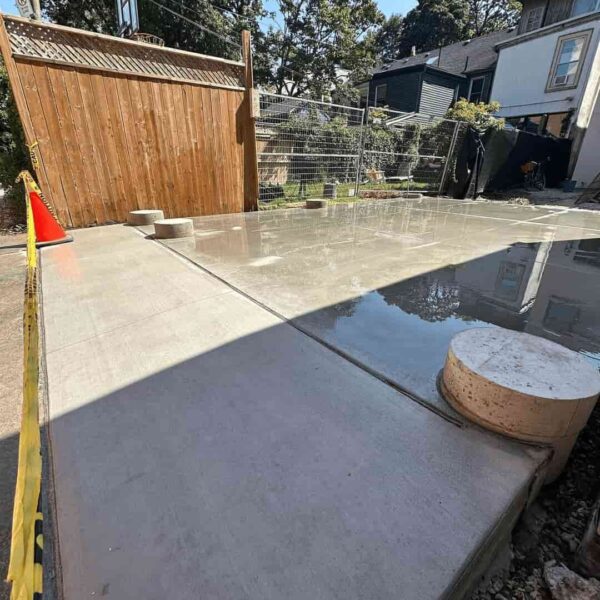
Images of the Entire Process
Step-by-Step Process
Once you understand the root causes of the problem, you can apply the appropriate techniques to remove dark wet spots. Here’s a step-by-step process:
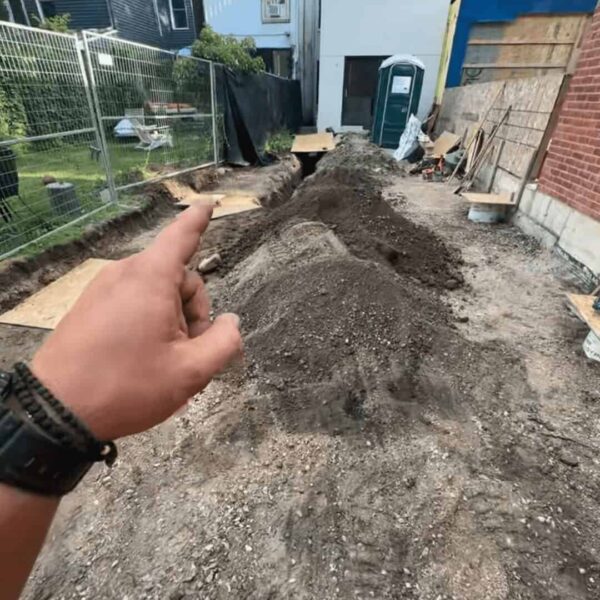
Step 1: Excavation
The first step in the installation process was excavation, where the team cleared the area of grass, dirt, and debris to create a stable foundation.
Why It’s Important: Excavation helps remove any unstable material that could cause the driveway to settle or crack in the future. A well-excavated surface ensures that the new concrete will be laid on solid ground, preventing potential issues like sinking or uneven surfaces.
What Could Go Wrong: If excavation isn’t done properly, the concrete may not adhere well to the surface, leading to cracks and premature failure of the driveway. Over time, an uneven or poorly excavated base can cause major structural issues.
Step 2: Trench Digging
Next, the team focused on trench digging, a vital step in the process. Trenches were dug to accommodate the forms for the concrete and ensure that the sides of the driveway are strong and supported.
Why It’s Important: Trench digging is essential to create a stable edge and prevent the driveway from cracking at the sides. It ensures proper water drainage and helps the concrete withstand external pressures.
What Could Go Wrong: Without properly dug trenches, the sides of the driveway might weaken over time. This can lead to water seepage, cracks, and crumbling of the concrete edges.
Step 3: Sono Tubes Installation
The next step involved installing Sono tubes, which are cylindrical forms that are used to create strong, stable posts or footings for the driveway.
Why It’s Important: Sono tubes provide additional support and help distribute the weight of the concrete evenly. This ensures that the driveway is stable and can bear the load of vehicles without sinking or shifting.
What Could Go Wrong: Skipping this step can lead to uneven weight distribution, causing the driveway to crack or settle unevenly over time. This could result in expensive repairs down the line.
Step 4: Gravel Base Installation
After the trenches and Sono tubes were in place, the team laid a gravel base to provide additional stability and drainage for the concrete.
Why It’s Important: A gravel base ensures proper drainage, preventing water from pooling underneath the concrete. It also helps the concrete adhere to the ground and prevents shifting or settling. The gravel creates a buffer that allows the ground to expand and contract with temperature changes, which reduces the likelihood of cracking.
What Could Go Wrong: Without a proper gravel base, water could accumulate under the concrete, leading to frost heave or soil erosion. This would cause the concrete to crack or shift, potentially requiring expensive repairs or even complete replacement.
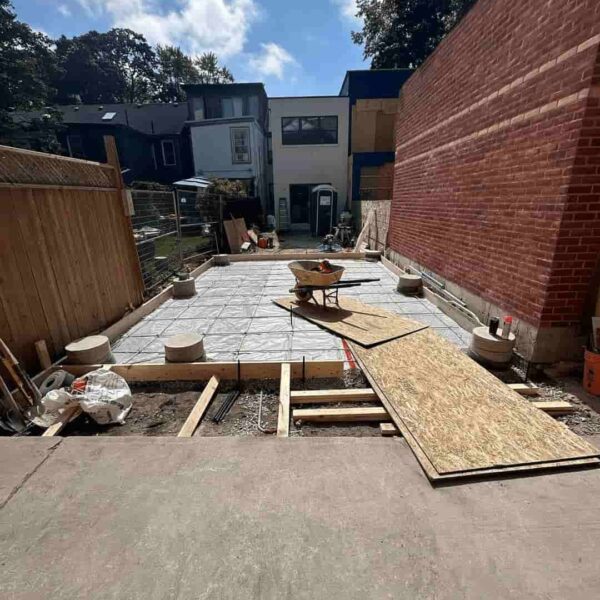
Step 5: Vapor Barrier Installation
Once the gravel base was laid, a vapor barrier was installed. This barrier is typically made of a durable plastic sheet and is placed between the gravel and the concrete.
Why It’s Important: The vapor barrier prevents moisture from seeping up from the ground into the concrete. Excess moisture can weaken the concrete, reduce its durability, and lead to cracks. This layer is especially important in regions with fluctuating temperatures, as it helps mitigate the effects of freezing and thawing.
What Could Go Wrong: Without a vapor barrier, moisture could enter the concrete, leading to degradation and weakening over time. This could cause premature cracking and reduce the lifespan of the driveway significantly.
Step 6: Metal Rebar Installation
To enhance the strength and durability of the driveway, metal rebars were installed. These steel bars are placed within the concrete to provide additional tensile strength.
Why It’s Important: Rebar significantly increases the concrete’s ability to withstand heavy loads and external stresses. It helps to prevent cracking and ensures that the driveway will last for many years, even with constant use.
What Could Go Wrong: If the concrete is poured without rebar, it will be much more susceptible to cracking, especially under heavy loads such as vehicles. Rebar provides structural integrity and prevents costly repairs in the future.
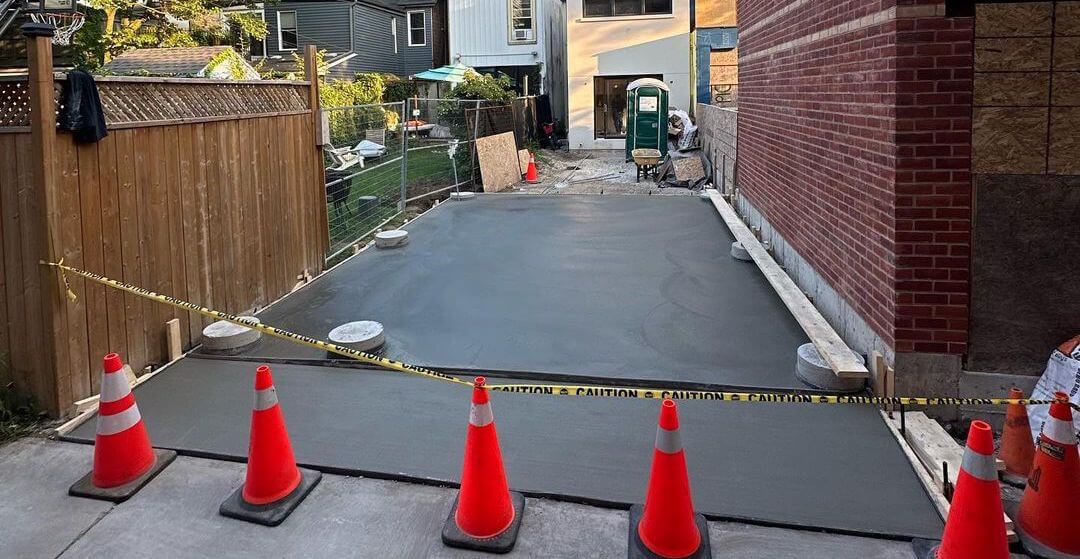
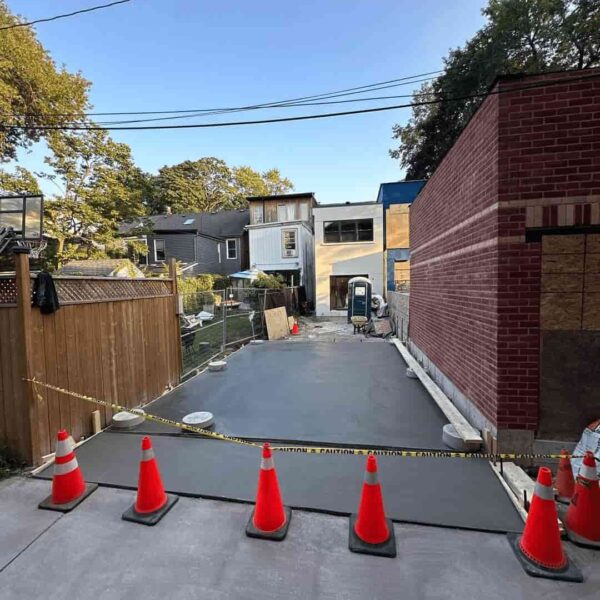
Step 7: Limestone Finish
The final step was applying a limestone finish to the concrete. This finishing touch gives the driveway an elegant, smooth appearance while providing additional protection.
Why It’s Important: A limestone finish is not only aesthetically pleasing but also offers added durability. It creates a harder surface, making the driveway resistant to weathering, stains, and general wear and tear.
What Could Go Wrong: Without a proper finish, the driveway could be vulnerable to environmental factors such as rain, snow, and UV radiation, which can degrade the concrete over time. A high-quality finish ensures that the driveway remains attractive and functional for years to come.
Final Outcome
The entire process took just 1.5 weeks to complete, a testament to Toronto Concrete Repair Inc.’s efficiency and expertise. Throughout the project, the team faced no major issues, and the client was delighted with the final result. The newly installed driveway not only enhanced the property’s curb appeal but also provided a functional and long-lasting solution for the homeowner.
Why Choose Toronto Concrete Repair Inc. for Your Driveway Installation?
Toronto Concrete Repair Inc. has a proven track record of delivering high-quality concrete installations in the Toronto area. Our expert team specializes in creating durable, long-lasting driveways that enhance your property’s curb appeal. We offer custom solutions tailored to your specific needs, using high-quality materials and modern techniques to ensure a smooth, crack-resistant surface.
Whether you need a new concrete installation or want to replace an existing driveway, we handle everything from excavation to the final finish. With competitive pricing and a commitment to excellence, we’re the go-to concrete contractors in Toronto. We offer FREE inspections and consultations to help you make the best decision for your property. Let us bring durability, functionality, and beauty to your home or business with our expert concrete services!